
Fall Winterization Instructions:
We can’t specifically address the set up for every sprinkler system, but here are the basics on winterizing a standard poly-pipe system for the season.
Watch the night-time temperatures! Once they fall below 32 degrees it is time to get this taken care of.
Many a homeowner has been fooled by beautiful days with cold nights and ended up with freeze damage.
You will need: a bucket, a large screwdriver or pliers with long handles and a flat blade screwdriver.
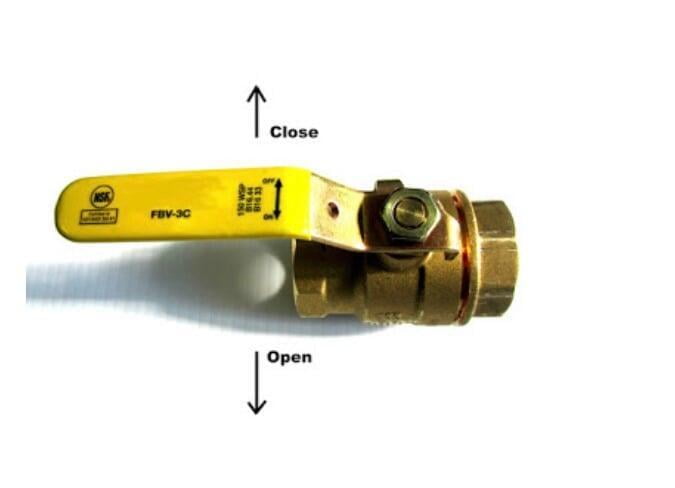
Step One: Turn off the sprinkler water supply inside
Go to the basement of to the utility room in your home and locate the water supply for the sprinkler system. This will be a flat handle near or above a hose bib or drain for the system. The handle will look similar to the photo on the right. The handle will be laying in the same direction as the pipe that it is on indicating the valve is open and the water is flowing through the valve. When you locate the correct handle (make sure you aren’t turning off the water to the entire house!), slowly turn the water off to the sprinkler. It will likely a thud or bang as it closes. Once it it fully closed, hang your bucket over the drain, or place it below the drain depending on your set up and open the hose bib drain. If you have turned off the correct water source you will get about a quarter of a bucket of water out of this pipe and then it will stop flowing. If it continues, you have not turned off the water to the sprinkler. Leave the bucket in place as more water will drain out when we drain the backflow outside.
Step Two: Open your valve box drains
There is at least one valve box in your yard. They are installed flush with the ground and have a green lid. If we installed your sprinkler, one will be straight out from the backflow device on the side of your house. You might have one for the front and one for the back The larger your system, the more valve boxes you are likely to find.
Lift the lid with the large screwdriver or pliers. Some boxes have a little clip inside the lid. Put the screwdriver in the access hole and push the entire lid towards the edge to release the clip then pull up. If your valve box has a manual drain, it will look much like the hose bib drain you just opened in your basement or like the ball valve you turned for the water. If you you have a manual drain open that drain and release the water. Leave it open.
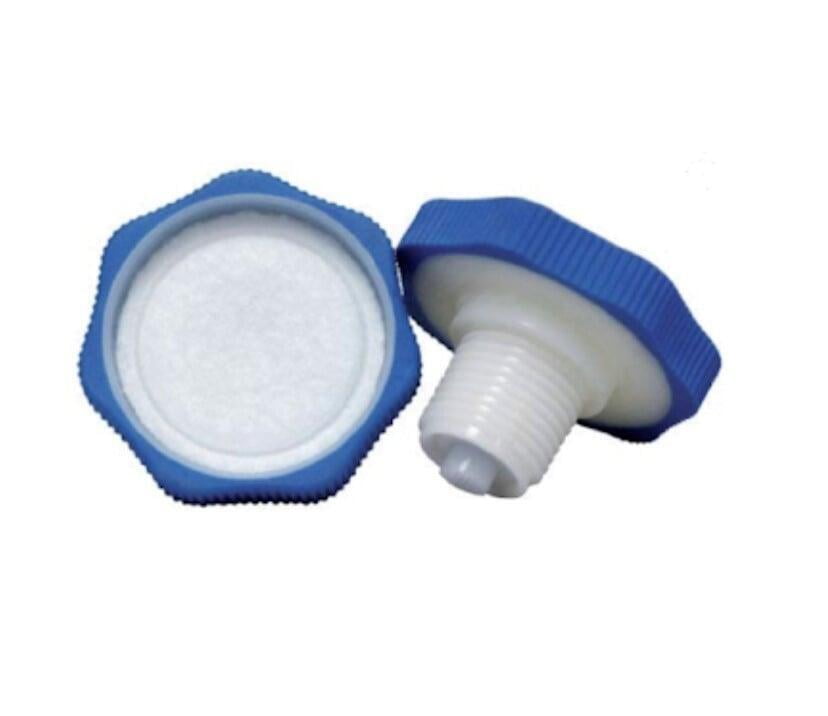
If you have more than one valve box on your system you may have more than one kind of drain – be sure to check them all. Auto drains are brightly colored. See photo to the right for an example.
You will also need to open any hose bibs or pool fill valves that may be connected to your sprinkler system.
Step Three: Drain the backflow
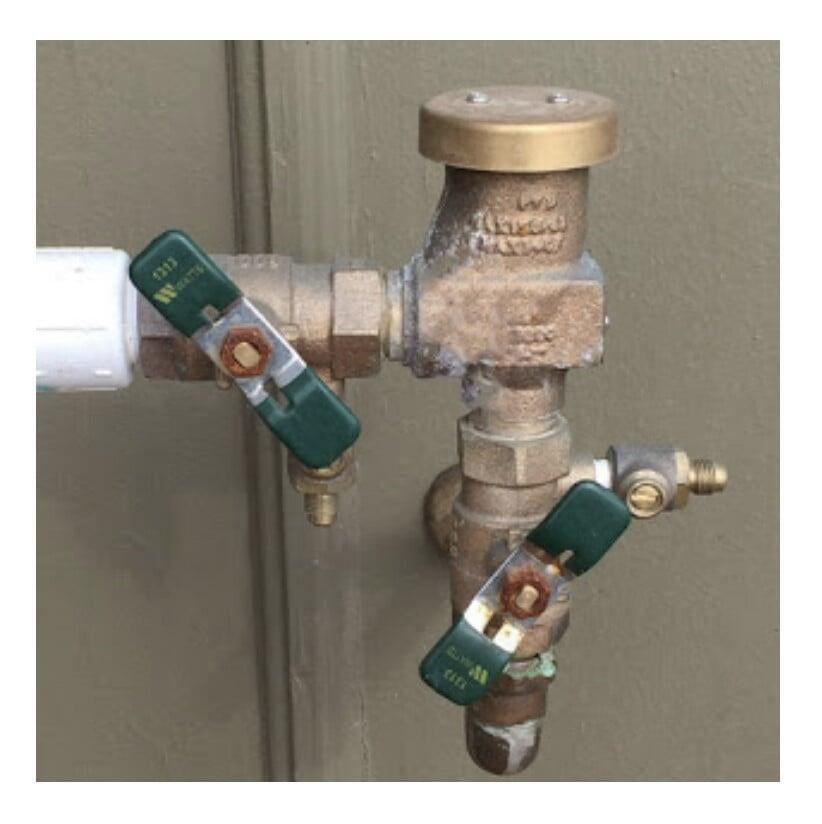
Your backflow device is locate on the outside of your home. Most commonly the backflow device is just up and outside from where you turned off the water in the basement. You will need that flat blade screwdriver for this step. Turn the screws on the test cocks (the little stubs sticking out either side) 1/4 turn until the line on the screw head is pointing in the same direction as the stub it is on. You should get a little water out when you do this. After you have turned the screws, turn the two ball valve handles 1/4 turn to a 45 degree angle. See the picture to the right of a properly winterized backflow.
Step Four: Close the basement drain
In step one we left the drain open in the basement to allow the water from the backflow to drain out into the bucket. Return to the basement, close the drain and dump your bucket.
It is a good practice to return to the basement drain in a week or so to check it’s seal. Simply reopen the drain and see if any water comes out. IF there is water present after you have winterized, your basement valve is not sealing properly and needs to be replaced. If the leak is minor you can leave your drain open with your bucked in place and empty it repeatedly over the winter. If you leave the drain close the leak will eventually fill the pipe and cause damage to the backflow and PVC pipe outside.
Step Five: Turn off your controller
Place the dial on your controller into the OFF position. There is no need to unplug the controller for the winter. Simply turning it to off will ensure you retain your preferred settings for next season. If you have a smart controller, your controller will continue to collect weather data over the winter while in the off position.